![[Unity C#] 유니티에서 플레이팹으로 로그인 및 리더보드 구현하기](https://img1.daumcdn.net/thumb/R750x0/?scode=mtistory2&fname=https%3A%2F%2Fblog.kakaocdn.net%2Fdna%2FtPGOV%2FdJMcagYHNLd%2FAAAAAAAAAAAAAAAAAAAAAKXP3xhlJjyCNbna58vTpvhfKgk0mNYOmv3acH6VkeCT%2Fimg.png%3Fcredential%3DyqXZFxpELC7KVnFOS48ylbz2pIh7yKj8%26expires%3D1782831599%26allow_ip%3D%26allow_referer%3D%26signature%3DFGyr4a3V1G30nF4SywRQ573v%252FZ0%253D)

자신만의 서버가 없는 경우에 서버 기능이 필요한 경우, 플레이팹은 하나의 강력한 도구가 될 수 있다.
이를 사용하여 리더보드 연동을 하는 법을 알아보자.
시작하기에 앞서
유니티에서 플레이팹을 사용하기 위해선 다음과 같은 작업이 우선 필요하다.
먼저 개발자 센터에서 스튜디오와 게임 타이틀을 생성해야 다음 작업을 진행할 수 있다.
1. PlayFab 개발자 페이지에서 스튜디오를 생성해준다.
2. Unity SDK 시작 가이드 에서 SDK를 다운로드하여 유니티 프로젝트에 임포트.

3. 임포트 후, PlayfabSharedSettings에 TitleID와 Developer Secret Key를 입력한다.

TitleID는 게임 스튜디오 바로 오른쪽 아래에, Developer Secret Key는 Setting -> Secret Key에 존재한다.
유니티에서 플레이팹 로그인
플레이어의 데이터를 불러오고 관리하기 위해선 먼저 로그인을 진행해야 한다.
이를 유니티 인게임에서 PlayFabClientAPI.LoginWithPlayFab 을 사용하여 간단하게 구현할 수 있다.
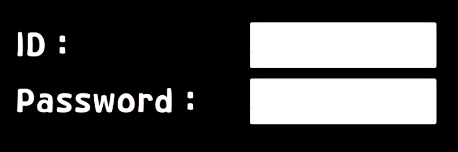
필자는 InputField를 이용하여 값을 받아서 적용해주었다.
var request = new LoginWithPlayFabRequest { Username = _id.text, Password = _password.text };
PlayFabClientAPI.LoginWithPlayFab(request, OnLoginSuccess, OnLoginFailure);

private void OnLoginSuccess(LoginResult result)
{
	// 로그인에 성공 시 원하는 기능 구현
}

private void OnLoginFailure(PlayFabError error)
{
	// 로그인에 실패 시 원하는 기능 구현
}
PlayFabClientAPI.LoginWithPlayFab 을 통해 로그인을 요청하여 서버에 존재하는 플레이어 값을 받아올 수 있다.
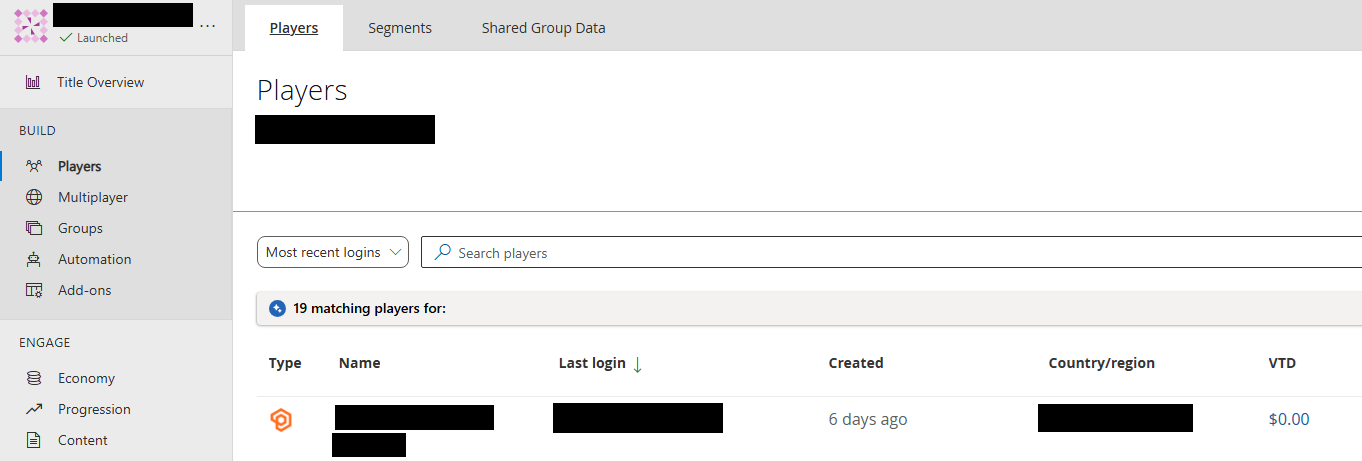
플레이어 정보는 Players 메뉴에서 가입된 유저 리스트를 확인할 수 있다.
리더보드 생성 및 데이터 업데이트
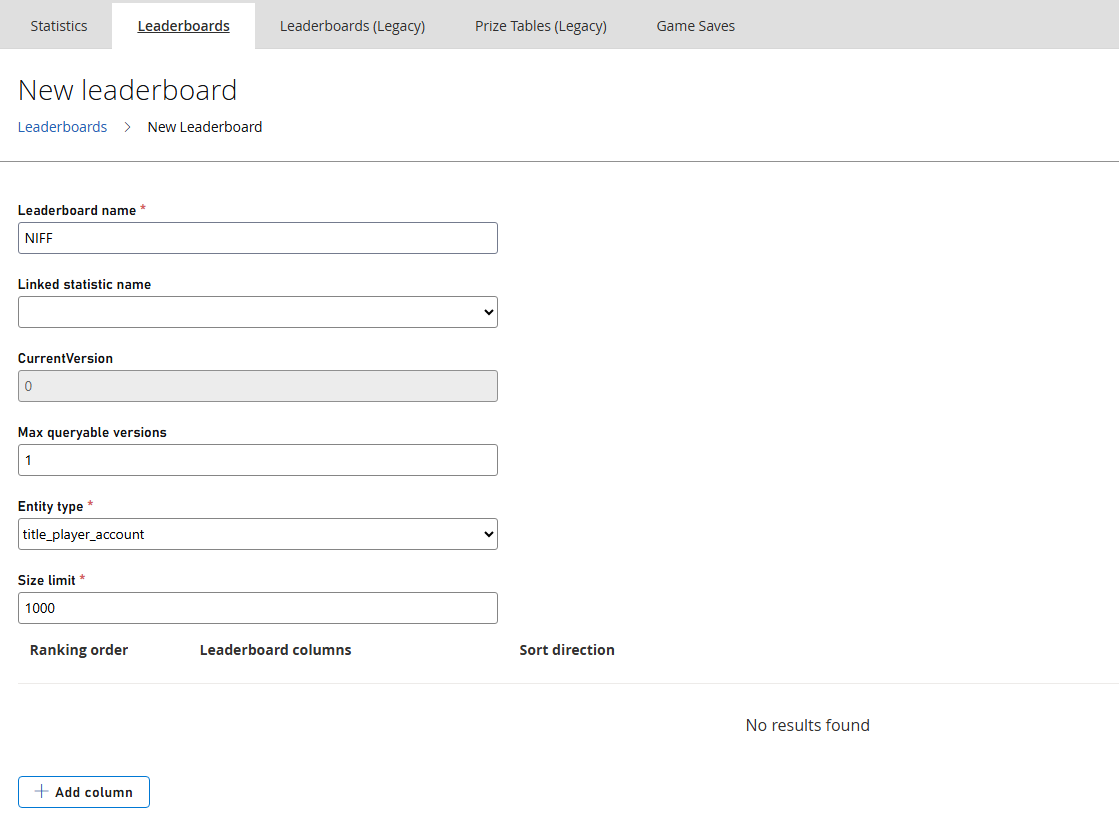
PlayFab 스튜디오의 Progression -> Leaderboards에서 새로운 리더보드를 생성해주어야 한다.
Leaderboard는 여러 개의 점수(Column)를 하나의 리더보드 항목에 담을 수 있다는 장점이 있다.
기존 버전인 Leaderboard (Legacy)는 여러 개의 점수를 한 곳에 담을 수 없다.
var request = new UpdateLeaderboardEntriesRequest
{
    LeaderboardName = "리더보드 이름",
    Entries = new List<LeaderboardEntryUpdate>
    {
        new LeaderboardEntryUpdate
        {
            EntityId = PlayFabSettings.staticPlayer.EntityId,
            Scores = new List<string> { "원하는 값 1". "원하는 값 2" }
        }
    }
};

PlayFabProgressionAPI.UpdateLeaderboardEntries(request,
    result =>
    {
        // 실행하고 싶은 내용
    },
    error => Debug.LogError(error.GenerateErrorReport())
);
플레이어의 점수나 기록을 서버에 전송할 때는 UpdateLeaderboardEntriesRequest 를 사용하여 request 생성 후 PlayFabProgressionAPI.UpdateLeaderboardEntries 를 이용하면 된다.
리더보드 데이터 불러오기 및 해석
var getRequest = new GetEntityLeaderboardRequest
{
    LeaderboardName = "리더보드 이름",
    PageSize = 20		// 불러올 리더보드 데이터 갯수
};

// 리더보드 확인
    PlayFabProgressionAPI.GetLeaderboard(getRequest
    , result =>
    {
        // 원하는 내용
    }
    , error => Debug.LogError(error.GenerateErrorReport()));
}
데이터 요청은 위에 과정과 비슷하게 GetEntityLeaderboardRequest request 를 생성 후 리더보드를 요청하게 된다.
이 때 받은 데이터는 다음과 같다.
/// <summary>
/// Leaderboard response
/// </summary>
[Serializable]
public class GetEntityLeaderboardResponse : PlayFabResultCommon
{
    /// <summary>
    /// Leaderboard columns describing the sort directions.
    /// </summary>
    public List<LeaderboardColumn> Columns;
    /// <summary>
    /// The number of entries on the leaderboard.
    /// </summary>
    public uint EntryCount;
    /// <summary>
    /// The time the next scheduled reset will occur. Null if the leaderboard does not reset on a schedule.
    /// </summary>
    public DateTime? NextReset;
    /// <summary>
    /// Individual entity rankings in the leaderboard, in sorted order by rank.
    /// </summary>
    public List<EntityLeaderboardEntry> Rankings;
    /// <summary>
    /// Version of the leaderboard being returned.
    /// </summary>
    public uint Version;
}
/// <summary>
/// Individual rank of an entity in a leaderboard
/// </summary>
[Serializable]
public class EntityLeaderboardEntry : PlayFabBaseModel
{
/// <summary>
/// Entity's display name.
/// </summary>
public string DisplayName;
/// <summary>
/// Entity identifier.
/// </summary>
public EntityKey Entity;
/// <summary>
/// The time at which the last update to the entry was recorded on the server.
/// </summary>
public DateTime LastUpdated;
/// <summary>
/// An opaque blob of data stored on the leaderboard entry. Note that the metadata is not used for ranking purposes.
/// </summary>
public string Metadata;
/// <summary>
/// Position on the leaderboard.
/// </summary>
public int Rank;
/// <summary>
/// Scores for the entry.
/// </summary>
public List<string> Scores;
} 리더보드에 올라가 있는 데이터들은 List<EntityLeaderboardEntry> Rankings 를 통해 접근할 수 있다.
EntityLeaderboardEntry 는 두 번째 코드블럭과 같이 구현되어 있고, 이를 통해 여러 값에 접근할 수 있다.
각 설명은 다음과 같다.
- DisplayName: 플레이어의 표시 이름
- Rank: 0부터 시작하는 순위 번호
- Scores: 리더보드 생성 시 설정한 Column 값들이 순서대로 저장된 문자열 리스트입니다.
- Metadata: 점수 외에 추가로 저장한 텍스트 정보
리더보드를 생성할 때, 추가한 column들은 모두 Scores에 들어가게 되고, column에 순서에 따라 Scores[0], Scores[1]로 불러올 수 있다.
private void OnGetLeaderboardSuccess(GetEntityLeaderboardResponse result)
{
    foreach (var data in result.Rankings)
    {
        // Scores 리스트는 생성 시 설정한 Column 순서에 따라 저장됨.
        string score = data.Scores[0];  // 첫 번째 Column (예: 점수)
        string time = data.Scores[1];   // 두 번째 Column (예: 클리어 타임)

        Debug.Log($"순위: {data.Rank + 1} | 이름: {data.DisplayName} | 점수: {score}");
    }
}
'Unity > 공부' 카테고리의 다른 글
| [Unity C#] 성능 저하를 미리 잡아주는 Project Auditor (2) | 2026.03.22 |
|---|---|
| [Unity C#] Photon Fusion2 환경에서 Photon Voice2 사용하기 (3) | 2025.12.11 |
| [Unity C#] 자연스럽게 등장하는 UI 애니메이션 구현 (0) | 2025.04.19 |
| [Unity C#] Dynamic Menu에 따른 카메라 움직임 구현 (0) | 2025.04.19 |
| [Unity C#] 씬 이동 시 로딩 화면 만들기 (0) | 2025.03.26 |
CSE & GAME 개발 블로그
포스팅이 좋았다면 "좋아요❤️" 또는 "구독👍🏻" 해주세요!
![[Unity C#] 성능 저하를 미리 잡아주는 Project Auditor](https://img1.daumcdn.net/thumb/R750x0/?scode=mtistory2&fname=https%3A%2F%2Fblog.kakaocdn.net%2Fdna%2Fbejo5Z%2FdJMcajuMB6f%2FAAAAAAAAAAAAAAAAAAAAADGzDuXKxE4dLuDcZp_xWNUkb9l6A6lpFkKmj1sfQ6A-%2Fimg.png%3Fcredential%3DyqXZFxpELC7KVnFOS48ylbz2pIh7yKj8%26expires%3D1782831599%26allow_ip%3D%26allow_referer%3D%26signature%3DyQsagDmi89Pt0UFOZ5%252FVPDBCW1k%253D)
![[Unity C#] Photon Fusion2 환경에서 Photon Voice2 사용하기](https://img1.daumcdn.net/thumb/R750x0/?scode=mtistory2&fname=https%3A%2F%2Fblog.kakaocdn.net%2Fdna%2FlqRpL%2FdJMb99SrQ9O%2FAAAAAAAAAAAAAAAAAAAAAFykkHHj_aDeIZn1U6iHwnFknKMMBseTSnxlFUkMrdK8%2Fimg.png%3Fcredential%3DyqXZFxpELC7KVnFOS48ylbz2pIh7yKj8%26expires%3D1782831599%26allow_ip%3D%26allow_referer%3D%26signature%3Dd7s%252FUd1S3DodXPAM%252BOh9aIeMeGY%253D)
![[Unity C#] 자연스럽게 등장하는 UI 애니메이션 구현](https://img1.daumcdn.net/thumb/R750x0/?scode=mtistory2&fname=https%3A%2F%2Fblog.kakaocdn.net%2Fdna%2FtaGOR%2FbtsNsc6CcXX%2FAAAAAAAAAAAAAAAAAAAAAPQwRQbCx0UoleDetU-B9h87Ae2p7RWJK63k4VZ0jS5T%2Fimg.png%3Fcredential%3DyqXZFxpELC7KVnFOS48ylbz2pIh7yKj8%26expires%3D1782831599%26allow_ip%3D%26allow_referer%3D%26signature%3DvAJDp7F72XPVTV0n0p9b9C2JbVk%253D)
![[Unity C#] Dynamic Menu에 따른 카메라 움직임 구현](https://img1.daumcdn.net/thumb/R750x0/?scode=mtistory2&fname=https%3A%2F%2Fblog.kakaocdn.net%2Fdna%2Fco4htn%2FbtsNrr92tIQ%2FAAAAAAAAAAAAAAAAAAAAAOafLPzLx2UkHuKnbvr3-MTZx7kpb_5lyQ5K-l8k-yAm%2Fimg.png%3Fcredential%3DyqXZFxpELC7KVnFOS48ylbz2pIh7yKj8%26expires%3D1782831599%26allow_ip%3D%26allow_referer%3D%26signature%3DcrSYLUXccPvufAIRlgAUgJ8fi48%253D)